
 We had our ceremony in a courtyard of a hotel here in Ottawa. The reception venue was beautifully decorated and had these gorgeous chandeliers (these may have been one of the biggest selling points of the space) , the ceremony space had a really nice gazebo with tulle and orchid decorations. But the chairs we rented for our guests to sit on were pretty boring. So, I went looking for inexpensive ways to decorate the space. Since I would need some of our family to do the decorating the morning of the wedding, I was looking for something that would be quick and easy for them as I really didn’t want to bother anyone too much. That is where these ribbon roses came into play. I spent quite a long while making them the weeks leading up to the wedding (mostly because I wasn’t sure how many I would need and ended up making a ton of extras), but they were pretty easy to make and despite the few minor burns the hot glue gun gave my fingertips, they were pretty fun to make as well.
Tag: DIY Weekend
Wedding DIY #4 – Bridal Bouquet
Wedding flowers can be expensive (I know mine were!) and when you think about it, unless you plan on preserving your bouquet (look for a DIY about this in the near future), they really don’t last that long. For me, flowers were one of the things where I just wasn’t going to compromise. I knew what I wanted from day 1 and though I looked around for the best deal, I was prepared to pay some extra money to get exactly the flowers I had envisioned. But this may not be the case for you. Perhaps you are a little more easy going than I was when it comes to the flowers of your wedding day. If you are this may just be the DIY project for you!
Grocery stores these days sell so many items including flowers. I have purchases beautiful flowers from the nearby Loblaws grocery store and have been able to make quite large bridal bouquets for around $35. There are usually extras to brighten up our house too! You just need to have an open mind, a few extra minutes the night before or morning of the wedding and most importantly, be flexible!

Materials: Flowers; Ribbon, lace or twine; Floral pins (you can buy these from most craft stores including Michaels); Elastic bands; Scissors
Instructions:
During the weeks leading up to your wedding, stroll through the floral department when you are buying your groceries to get a feel for what they tend to have in stock on a regular basis. Most stores stock standard flowers like roses, carnations and lilies year-round, and then have seasonal flowers like peonies and tulips as well. You will notice that the stores probably sells pre-made bouquets as well as packages of a single type of flower. From this you should be able to come up with a few ideas for your wedding day flowers. Then try searching online to see what the pros have done in terms of arranging the flowers into a bouquet. Come up with a few different variations in terms of colour and type of flowers.
Either the night before, or the morning of your wedding, make a trip to the grocery store and purchase your flowers. Try to go to the store with a few ideas in mind in terms of types of flowers and colour scheme. Look for flowers with varying height or texture to really add uniqueness to your bouquet.
Once you have bought your flowers and returned home, take them out of their packages and place them in water with some of the powdered plant food that likely came with at least one of them. Begin arranging your flowers in your hand, or that of a helper until you have the look you want. Then put an elastic band around the stems and carefully cut the stems to the desired length (try holding it in your hands to make sure you don’t cut it too short). Wrap the stems with your ribbon, lace or twine making sure you cover it well (I usually need to go around the stems 2-3 times before it looks good enough). Secure the ribbon, etc. in place using floral pins.
Repeat this last part for any additional bouquets your bridesmaids need.
If you have purchased a pre-made bouquet, I would still suggest taking the flowers out of the package and rearranging them into your bouquet. Though it is super handy when it comes to getting a variety of flowers, they tend to be packaged for display in a vase which isn’t necessarily conducive to your bouquet design.

When it comes to other flowers for your wedding, consider using flowers from the grocery store in your centrepieces, ceremony decorations and reception decorations. If you can make the decorations in advance and then have a family member, friend or member of the bridal party plunk the actual flowers in the day of, you can save a ton of money without adding a lot of stress to your day.
All that being said, I personally wouldn’t try making corsages and the only boutonnieres I would make would be very simple (one or two flowers wrapped in ribbon then pinned on). I just haven’t had much success in either of these departments when it comes to making something that looks good and will last through your wedding day.
For reference sake, the first bouquet pictured above was made from packages of different flowers including white carnations, white hydrangea, pink peonies and this very vibrant pink flower that I don’t know the name of. I used this unknown flower to create height to the bouquet and the other flowers for varying texture all to create a very soft bridal bouquet. Overall the bouquet cost just under $40 and the flowers leftover would have easily made a bridesmaid bouquet.
The second bouquet pictured above was made from a pre-made bouquet. I was able to use the wide variety of flowers to create a very unique bridal bouquet. The bouquet cost only $20 but didn’t leave many flowers leftover for other bouquets.
Wedding DIY #2 – Homemade Treat Favours
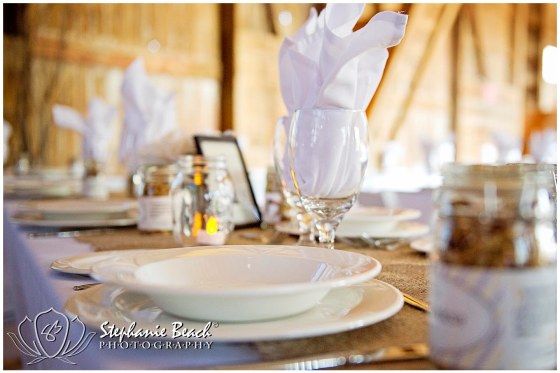
Today’s Wedding DIY comes once again from Jessica + Jesse’s Wedding. They gave out a delicious treat as their wedding favour in glass jars with custom labels on them. There are lots of different things you could give to your guests in containers like this such as your favourite candy or chocolate treat, or as in this case, homemade granola. (Note: If you are using something such as nuts, peanuts, etc. make sure you let your guests know in case they have allergies.)

Materials: Mason jars or other glass jars; homemade treats (in this case delicious granola); labels
Directions: After preparing your treat and making sure your jars are nice and clean (and dry), stick labels on them. These labels could be ordered through a store like Staples, or prepared with one of many office supply products (e.g. Avery labels) that you can create on your computer and print at home. You can also order custom-designed labels online.
Decorate the outside with ribbon if desired.
Finally place the treat in the jar and close it shut.
Give to your guests and let them enjoy!

Wedding DIY #1 – Book Theme Table Numbers
There are endless possibilities for Table Numbers these days. This version comes straight from Jessica + Jesse’s wedding. They are simple to make, easy to tailor to any style or theme of wedding and are perfect for any couple that LOVES literature! In this case they were absolutely fantastic for this country wedding!

Materials: 4″x6″ black frames, card stock and a book you don’t mind tearing up. (not too many materials and all of them are pretty inexpensive!)
Instructions: Pick a few pages full of text or a great image from an old book and then carefully tear them out of the book.
If your book is larger than 4″x6″, you will need to trim the pages down to size.
Cut numbers of out black card stock and stick them onto the book pages.
Place these into the frames and Voila!
You can change the overall look of the table numbers by the style of the numbers you use or the type/colour of frames you choose.
This also works really great as a conversation starter for your guests once they are seated as they can try to figure out what book the pages are from!
